How To Build a PHP Contact Form - Part 3 of 3
In part 2 of this tutorial we added the phpMailer library to the PHP contact form. In part 3 we will add a MySQL database to store the leads for re-use later.
Installing MySQL through XAMPP
Open the Apache Friends website.
Click the XAMPP for Windows button to save the file on your desktop.
Double-click the downloaded file to launch the installer.
Click the OK button.

Click the Next button.
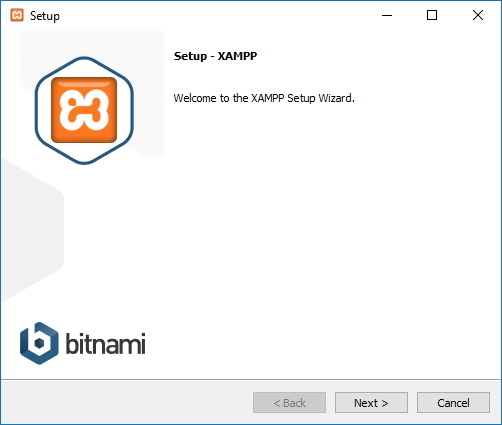
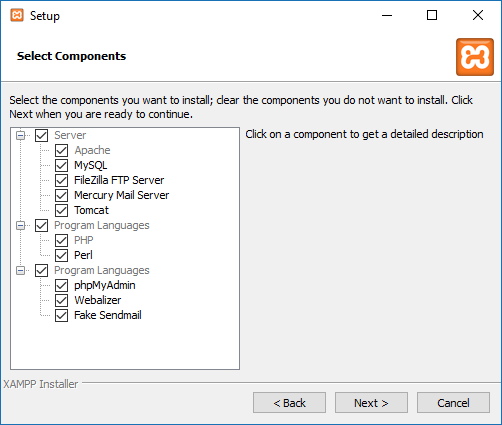
XAMPP offers a variety of components that you can install, such as MySQL, phpMyAdmin, PHP, Apache, and more. For the most part, you will be using most of these components, as such it’s recommended to leave the default options.
Click the Next button.
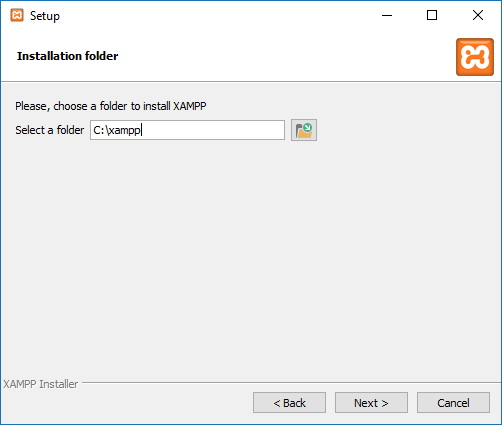
Use the default installed location, or choose another folder to install the software in the “Select a folder” field.
Click the Next button.
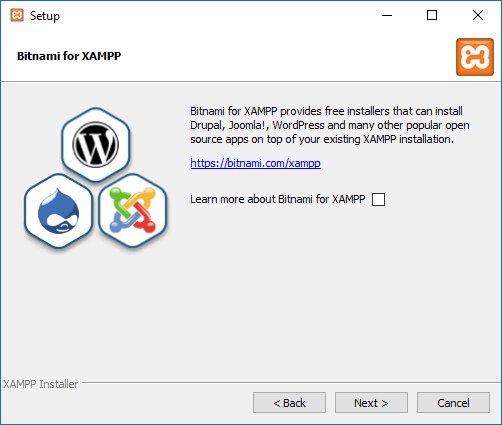
Clear the Learn more about Bitnami for XAMPP option.
Click the Next button.
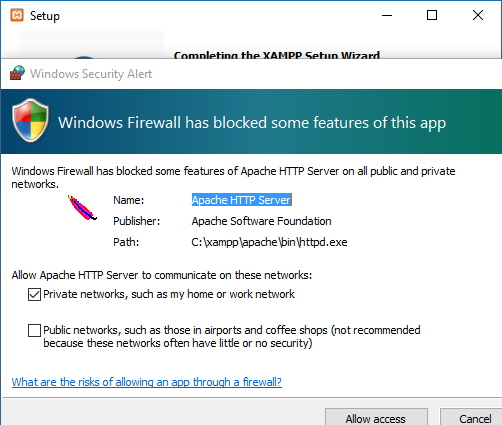
Click the Allow access button to allow the app through the firewall (if applicable).
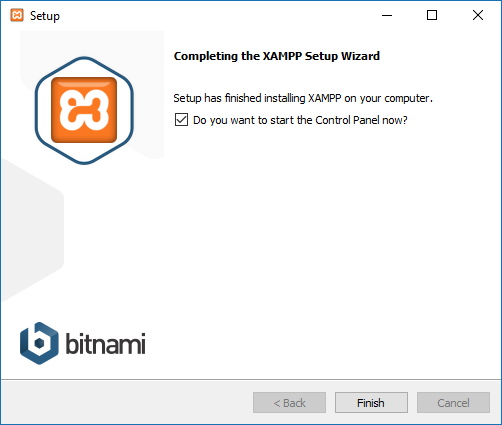
Click the Finish button.
Choose your language (English or German).
Click the Save button.
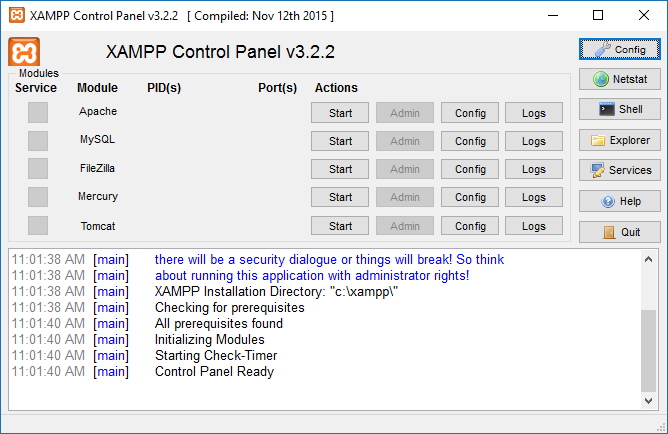
The XAMPP Control Panel includes three main sections. In the Modules section, you’ll find all the web services available. You can start each service by clicking the Start button.
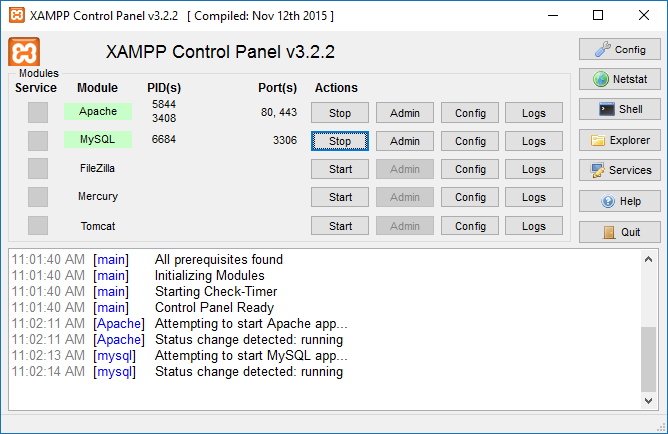
Now we want to go to phpMyAdmin to setup our database. Open up your browser and go to http://localhost/phpmyadmin/server_sql.php then paste in the code below. This will create the database and the table along with the required fields for the project.
      --
      -- Database: `youtube`
      --
      CREATE DATABASE IF NOT EXISTS `youtube` DEFAULT CHARACTER SET latin1 COLLATE latin1_swedish_ci;
      USE `youtube`;

      -- --------------------------------------------------------

      --
      -- Table structure for table `leads`
      --

      DROP TABLE IF EXISTS `leads`;
      CREATE TABLE IF NOT EXISTS `leads` (
        `id` int(11) NOT NULL AUTO_INCREMENT,
        `first_name` varchar(255) NOT NULL,
        `last_name` varchar(255) NOT NULL,
        `email` varchar(255) NOT NULL,
        `message` text NOT NULL,
        `created` timestamp NOT NULL DEFAULT CURRENT_TIMESTAMP ON UPDATE CURRENT_TIMESTAMP,
        PRIMARY KEY (`id`),
        KEY `email` (`email`)
      ) ENGINE=InnoDB DEFAULT CHARSET=latin1;
Create a file called db.php in your app directory and paste the following code inside.
      <?php
      $db_servername = "localhost";
      $db_username = "root";
      $db_password = "";
      $db_dbname = "youtube";

      try {
          $pdo = new PDO("mysql:host=$db_servername;dbname=$db_dbname", $db_username, $db_password);
          // set the PDO error mode to exception
          $pdo->setAttribute(PDO::ATTR_ERRMODE, PDO::ERRMODE_EXCEPTION);
          //echo "Connected successfully";
          }
      catch(PDOException $e)
          {
          echo "Connection failed: " . $e->getMessage(); // log this and send a smoke signal
          }
      ?>
All we need to do now is add the database file within the script. We want to only include this if no errors are present so the section we will be wokring in is the if(count($errors) == 0) { // } conditional.
      if(count($errors) == 0) {
        // wake up Mr SQL
        include('../app/db.php');
        // store the info the database
        $stmt = $pdo->prepare('INSERT INTO leads (first_name, last_name, email, message) VALUES (:first_name, :last_name, :email, :message)');
        $stmt->bindParam(':first_name', $first_name, PDO::PARAM_STR);
        $stmt->bindParam(':last_name', $last_name, PDO::PARAM_STR);
        $stmt->bindParam(':email', $email, PDO::PARAM_STR);
        $stmt->bindParam(':message', $message, PDO::PARAM_STR);
        $stmt->execute();
        ... continued
      }
Now lets pull the entire project together, below is the code for the complete script.
      <?php
      // import phpmailer global namespace - must be at the very op of your script (not inside a function)
      use PHPMailer\PHPMailer\PHPMailer;
      use PHPMailer\PHPMailer\SMTP;
      //set the correct timezone
      date_default_timezone_set('Africa/Johannesburg');
      // Load Composer's autoloader
      require '../vendor/autoload.php';
      // handle the post request
      if($_SERVER['REQUEST_METHOD'] == 'POST') {
        // initialize everything
        // set the error variable array
        $errors = array();
        // functions
        function clean_input($user_input) {
          $user_input = trim($user_input);
          $user_input = stripslashes($user_input);
          $user_input = htmlspecialchars($user_input);
          return $user_input;
        }
        // check if the user input is empty, clean it up and set the variables.
        // first name
        if(!empty($_POST['first_name'])) {
          $first_name = clean_input($_POST['first_name']);
        } else {
          array_push($errors, "First name cannot be empty.");
        }
        // last name
        if(!empty($_POST['last_name'])) {
          $last_name = clean_input($_POST['last_name']);
        } else {
          array_push($errors, "Last name cannot be empty.");
        }
        // email address
        if(!empty($_POST['email'])) {
          // check if this is a legit email address
          if(filter_var($_POST['email'], FILTER_VALIDATE_EMAIL)) {
            $email = clean_input($_POST['email']);
          } else {
            array_push($errors, "The e-mail address is not valid.");
          }
        } else {
          array_push($errors, "E-mail cannot be empty.");
        }
        // form message
        if(!empty($_POST['message'])) {
          $message = clean_input($_POST['message']);
        } else {
          array_push($errors, "Please enter your message.");
        }
        // send the email
        if(count($errors) == 0) {
          // wake up Mr SQL
          include('../app/db.php');
          // store the info the database
          $stmt = $pdo->prepare('INSERT INTO leads (first_name, last_name, email, message) VALUES (:first_name, :last_name, :email, :message)');
          $stmt->bindParam(':first_name', $first_name, PDO::PARAM_STR);
          $stmt->bindParam(':last_name', $last_name, PDO::PARAM_STR);
          $stmt->bindParam(':email', $email, PDO::PARAM_STR);
          $stmt->bindParam(':message', $message, PDO::PARAM_STR);
          $stmt->execute();
          // wrap the message
          $message = wordwrap($message);
          // send the mail
          $mail = new PHPMailer;
          $mail->isSMTP();
          $mail->SMTPDebug = 0;
          // mail server configuration
          $mail->Host = 'mail.devspace.co.za';
          $mail->Port = '465';
          $mail->SMTPSecure = 'ssl';
          $mail->SMTPAuth = true;
          $mail->Username = 'no-reply@devspace.co.za';
          $mail->Password = 'WPeaVXGUfmCVenXPOJ';
          // Recipients
          $mail->setFrom('no-reply@devspace.co.za', 'Website Mail Service');
          $mail->addAddress('youtube@erikthiart.com', 'Erik Thiart');
          // mail content
          $mail->isHTML(true);
          $mail->Subject = "Website Enquiry";
          $mail->Body =
          '
          <h4>Website Enquiry</h4>
          <strong>Full Name:</strong> '.$first_name.' '.$last_name.'<br>
          <strong>E-mail Address:</strong> '.$email.'<br>
          <strong>Message:</strong> '.$message.'<br>
          <br>
          Timestamp: '.date('Y-m-d H:i:s').'
          ';
          // send the mail
          if($mail->send()) {
            $confirm_message = 'Thank you for your message, '.$first_name.' - we have received it sucessfully.';
          } else {
            // display a useful message. (dont lose the client)
            array_push($errors, "The email failed to sent, here is the error: ".$mail->ErrorInfo);
          }
        }
      }
      ?>
      <?php include 'header.php'; ?>
      <div class="jumbotron jumbotron-fluid">
        <div class="container">
          <h1 class="display-4">Advanced contact form</h1>
        </div>
      </div>
      <div class="container">
        <div class="row">
          <div class="col-sm">
            <?php if(!empty($errors)): ?>
              <div class="alert alert-danger" role="alert">
                  <?php
                    foreach($errors as $error) {
                      echo $error . "<br>";
                    }
                  ?>
              </div>
            <?php endif;?>
            <?php if(!empty($confirm_message)):?>
              <div class="alert alert-success" role="alert">
                  <?=$confirm_message;?>
              </div>
            <?php endif;?>
            <form action="" method="post">
              <div class="form-group">
                <label for="">First Name</label>
                <input type="text" class="form-control" id="first_name" name="first_name">
              </div>
              <div class="form-group">
                <label for="">Last Name</label>
                <input type="text" class="form-control" id="last_name" name="last_name">
              </div>
              <div class="form-group">
                <label for="">Email address</label>
                <input type="email" class="form-control" id="email" name="email">
              </div>
              <div class="form-group">
                <label for="message">Message</label>
                <textarea class="form-control" id="message" name="message" rows="3"></textarea>
              </div>
              <button type="submit" class="btn btn-primary">Submit</button>
            </form>
          </div>
        </div>
      </div>
      <?php include 'footer.php'; ?>
This entire project is available on github and can be accessed here


